Introduction
Patching is essential to ensure that your systems remain up to date and free from vulnerabilities. Asides from this, as new application versions come along, they introduce additional features and functionality that you can take advantage of.
In this final part in the series, let’s take a look at how Microsoft Intune can assist with this through Intune Supersedence.
Recap
In Part 1 we looked at installing the FortiClient VPN software.
In Part 2 we pushed a Powershell script to setup the VPN profiles required to connect back to our corporate environment.
Getting Started
Similar to Part 2, you should now have:
- A Windows 10/11 laptop or VM deployed
- The laptop or VM is connected and available via Microsoft Intune
- FortiClient VPN installed by Intune package. The VPN profiles (deployed in Part 2) are not a requirement of this exercise, so if they are not configured it is not important
Creating the Upgrade Package
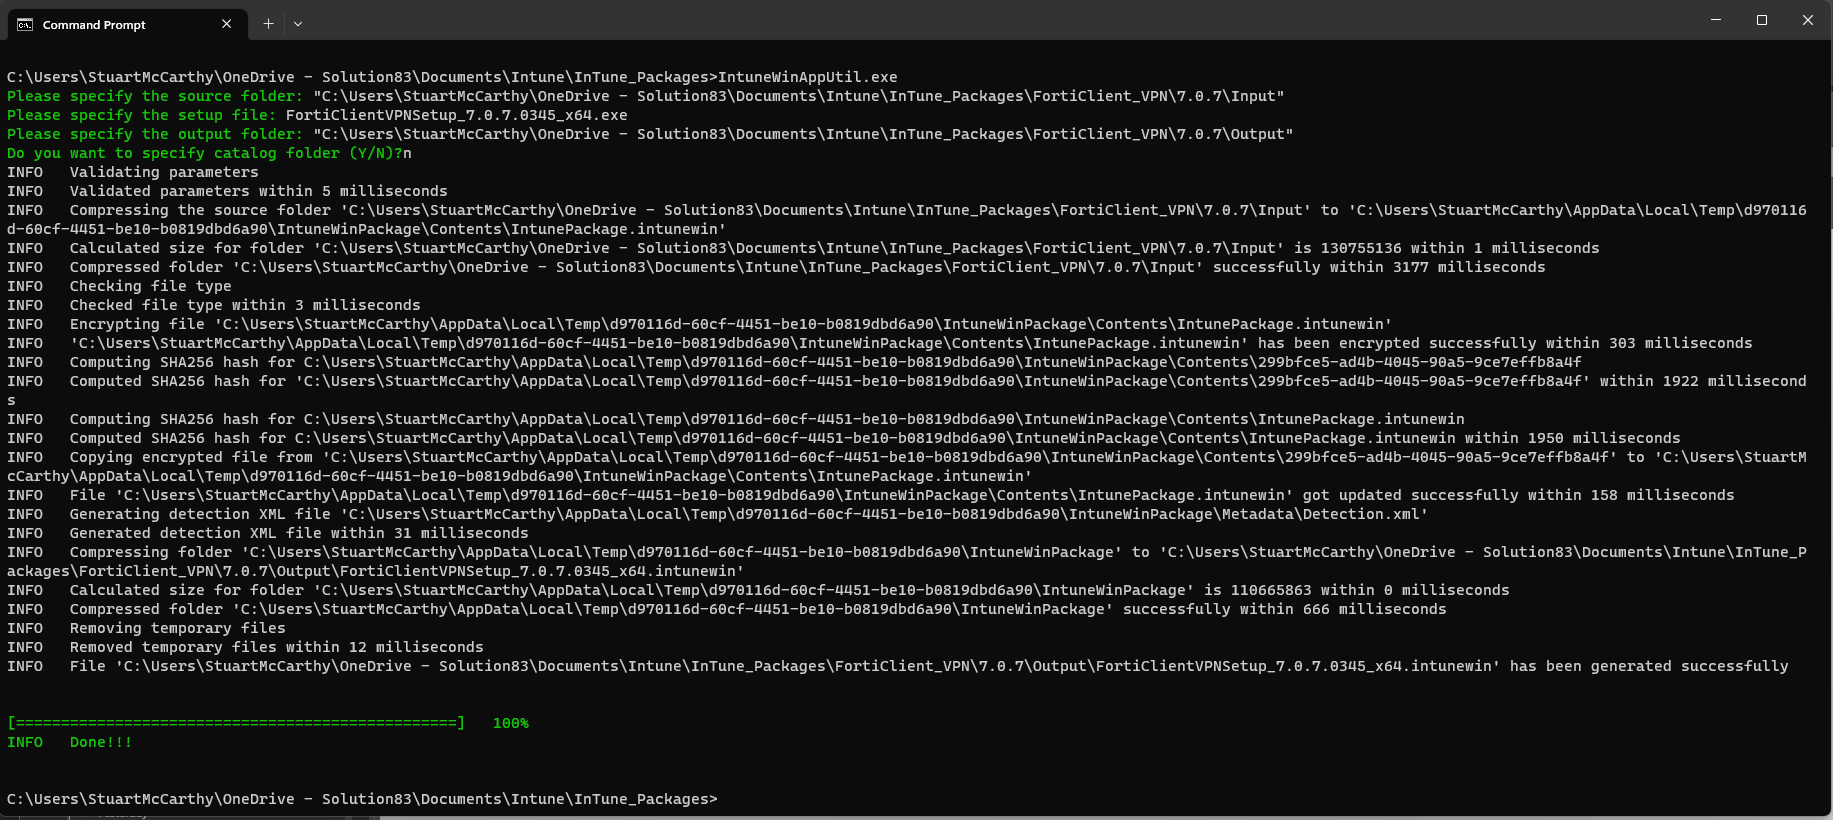
In Part 1 of the series, we created an .intunewin package in order to deploy FortiClient VPN 7.0.6. This time we are going to perform the same steps, however we will utilise FortiClient VPN 7.0.7.
First, make sure you have a copy of the FortiClient VPN package by downloading from:
Intune Configuration
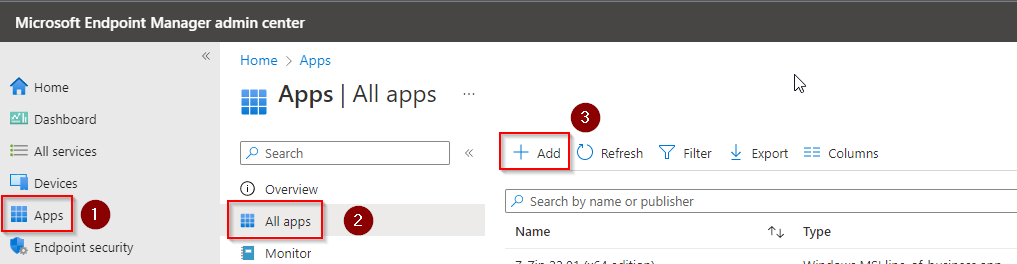
- Select the Apps option
- Select All Apps
- Click Add
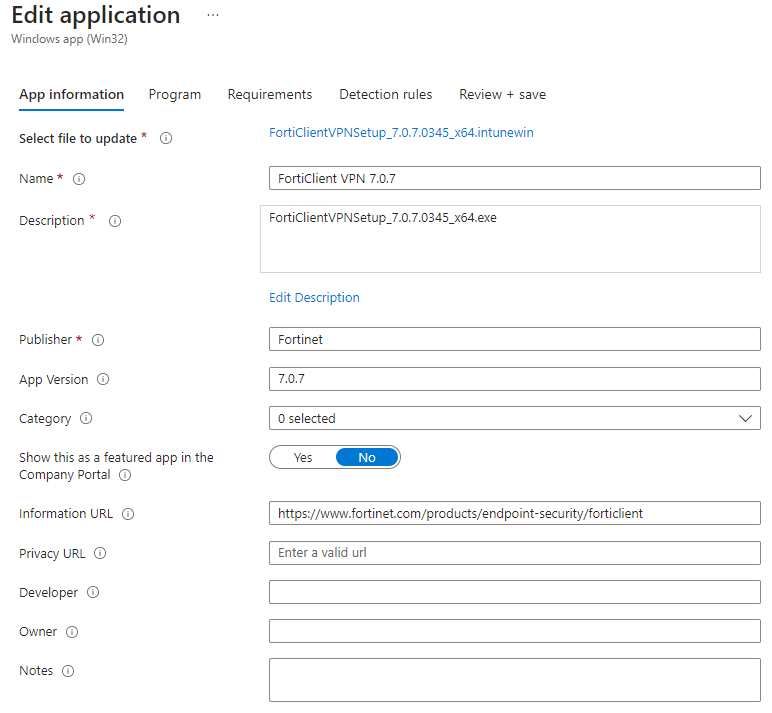
On the App Information page, we need to upload the package again and update all the relevant details:
- Make sure the name is something useful – note that I have used FortiClient VPN 7.0.7 this time
- At a minimum, ensure that Name, Description and Publisher are set if they aren’t already
- Click Next to continue
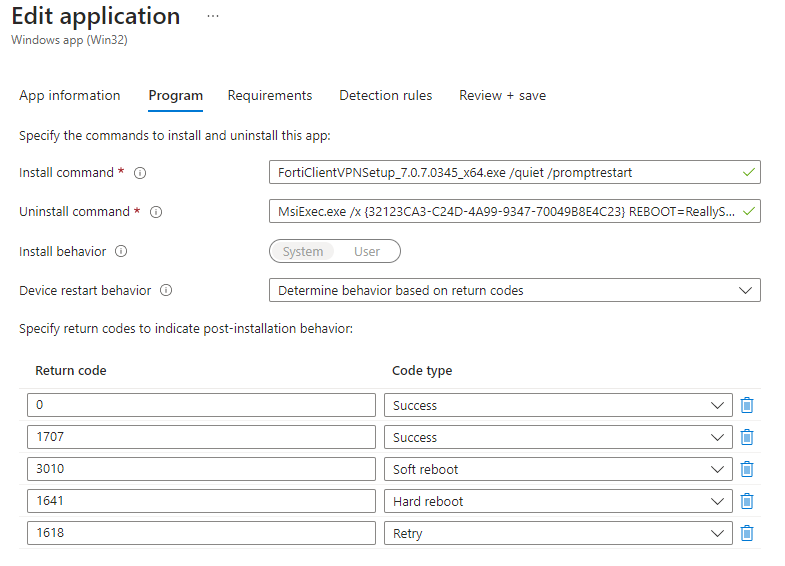
On the ‘Program’ tab, we need to ensure that the install and uninstall commands are specified. I learnt some important information about this step which I will share at the end.
On the ‘Requirements’ tab, make sure that the Operating System Architecture and Minimum Operating System are set to meet your requirements:

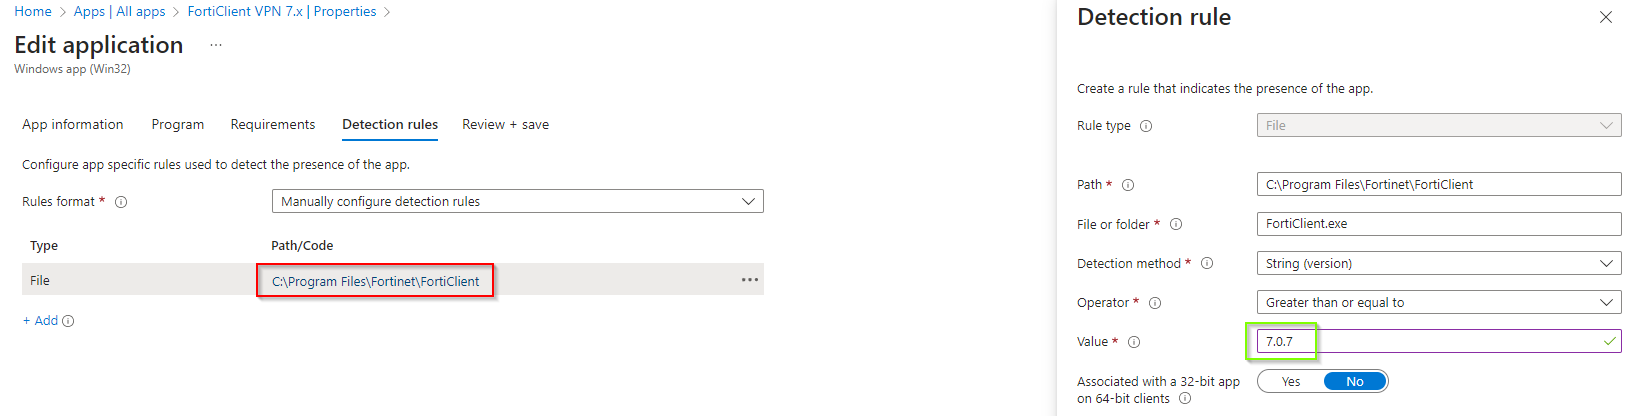
On the ‘Detection Rules’ tab, we need to create a rule that looks for FortiClient.exe and checks the version of the file. To do this:
- Set rules format to = Manually Configure Detection Rules
- Click +Add hyperlink
- You should end up with the following:
If you have deployed this as a new rule, you will have some additional tabs available including, Dependencies, Supersedence (preview), and Assignments as you see below. Please accept the default settings as we will configure these afterwards.

Supersedence
Simply put, supersedence allows you to create a relationship between Win32 applications to show which version is current, and which version it replaces. To look at supercedence:
- Select the application profile you just created
- Select Properties
- Scroll down until you find ‘Supersedence (preview)’ and click Edit

Within this section, you will see the ‘Dependencies’ and ‘Supersedence’ tabs. In this case we can ignore dependencies and focus on supersedence.
We need to select the previous version of the application which is going to be superseded. Considering 7.0.6 is what is already installed, I am going to select that as you see below:
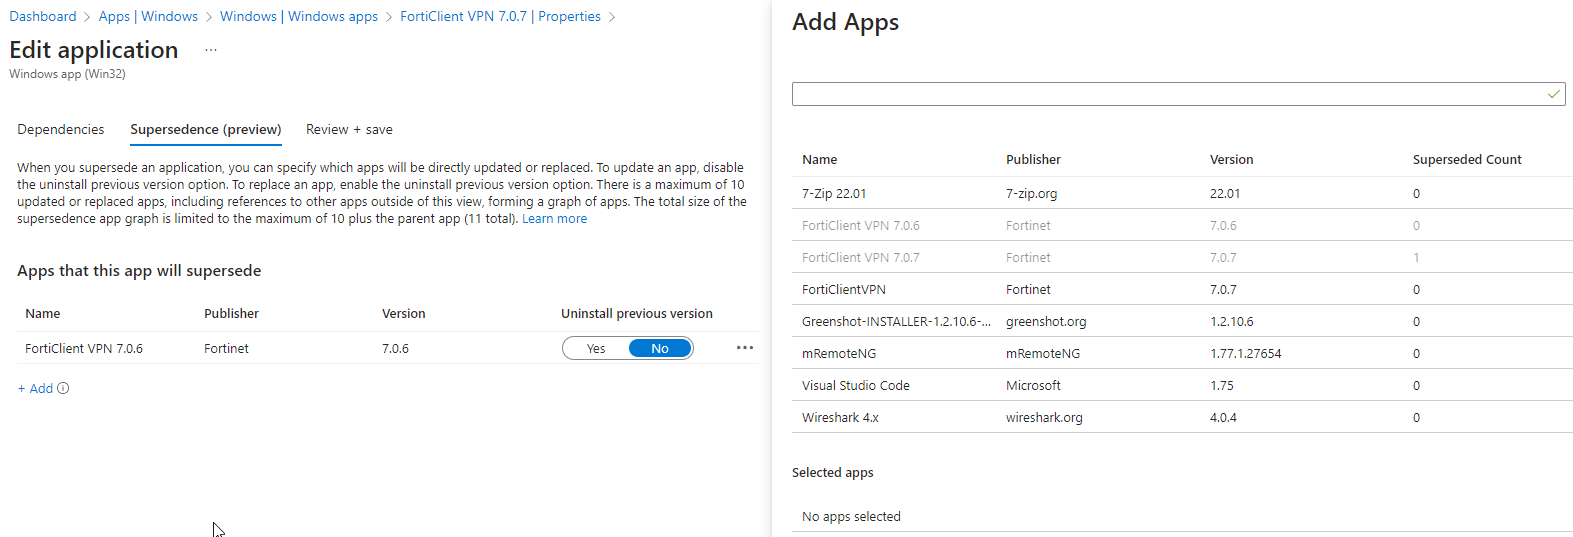
After you have selected the application to supersede, save your changes.
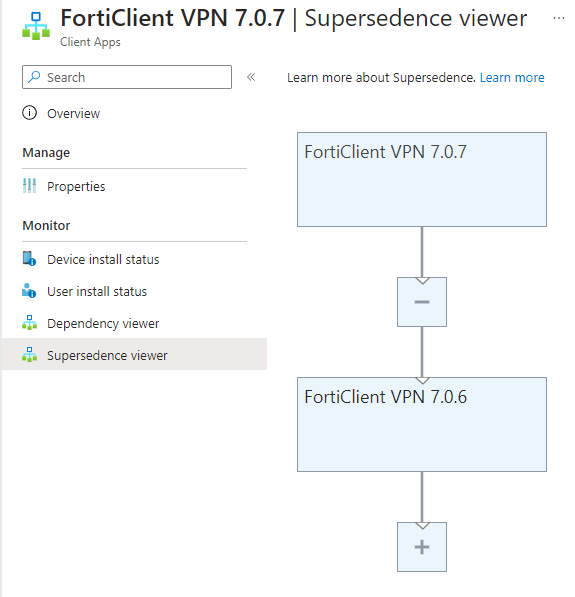
Still in the properties for the application, we can see on the left the ‘Supersedence Viewer’. If you select that, you can view a hierarchical topology of the supersedence. If done correctly, it should look something like this:
The only thing left at this point is to edit the assignment and select the group which you want to target, likely exactly the same as you have in place for the previous assignment. After the relevant groups are assigned, there is a few ways to trigger the upgrade:
- Wait for it to happen – likely the way this would regularly apply to users
- Perform a sync – either from device menu in Intune, or running from the device
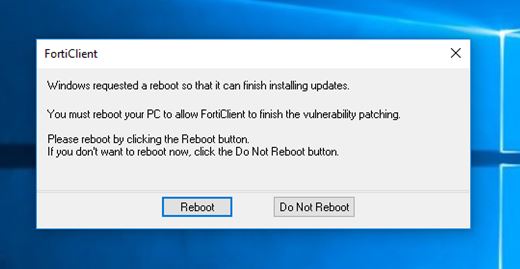
- Perform a reboot
Learnings
As mentioned earlier, one thing in particular that I learnt about was the importance of understanding:
- Installer / uninstaller logic
- How to get the right information to assist with installing an uninstalling
- Understanding any application dependencies during upgrades
A few resources I can suggest:
- https://silentinstallhq.com/ – the owner (Jason Bergner) whom I haven’t met has a fantastic repository of content around application installs and uninstalls, including some advanced scripts – definitely worth taking a look at
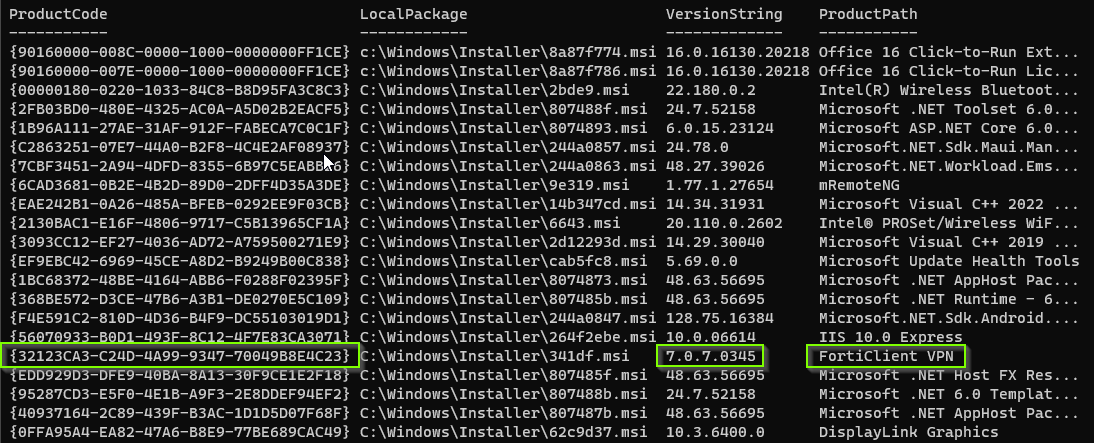
- When an application is installed, there is an associated product code which links to a cached MSI file for the uninstaller. I found the following Powershell query that allows for you to find it:
$Installer = New-Object -ComObject WindowsInstaller.Installer; $InstallerProducts = $Installer.ProductsEx("", "", 7); $InstalledProducts = ForEach($Product in $InstallerProducts){[PSCustomObject]@{ProductCode = $Product.ProductCode(); LocalPackage = $Product.InstallProperty("LocalPackage"); VersionString = $Product.InstallProperty("VersionString"); ProductPath = $Product.InstallProperty("ProductName")}} $InstalledProducts
The output from this would be quite long, however I found what I was looking for. You will notice earlier in this blog that this ID is referenced in the uninstaller command:
Closing Statement
That brings this series about installing FortiClient VPN with Intune to a close. I very much enjoyed writing this series and learnt quite a few things along the way. I hope you found the content useful!